
How to Install LED Luminous Signs: A Complete Guide for Sign Shops

Introduction: Why Proper Installation Matters
To install LED luminous signs correctly, you need the right mounting hardware for your wall type, proper wiring with adequate voltage planning, and thorough testing before and after installation. A properly installed LED sign lasts 5 to 7 years with minimal maintenance, while a poorly mounted one fails within 6 months and causes water damage, electrical hazards, premature LED failure, and costly warranty callbacks. Whether you’re installing channel letters, backlit signs, or front-lit acrylic letters, the four core principles—proper surface preparation, correct mounting method selection, professional wiring, and thorough testing—remain the same.
According to the International Sign Association (ISA, 2025), approximately 75% of LED sign failures are caused by improper installation rather than component defects. This guide walks you through every stage of LED sign installation, from wall preparation to final testing. We cover all four major mounting methods, the tools you need, and the mistakes that trip up even experienced installers. If you’re looking for a deeper dive into specific mounting hardware, check out our detailed comparison of backlit sign support systems.
Tools and Materials You’ll Need
Before heading to the job site, make sure your kit includes the following essentials:
- Drilling tools — A reliable cordless drill (18V minimum recommended) and appropriate drill bits
- Mounting hardware — Screws, support feet, brackets, or magnetic track components (depending on your mounting method)
- Electrical tools — Wire strippers, connectors, and a power tester
- Alignment tools — A spirit level (minimum 600mm/24-inch), measuring tape, and marking pencil
- Testing equipment — An LED aging test bench for pre-testing modules off-site
You can browse our full range of sign shop tools and screws and fasteners to stock up before your next install.
Step 1: Wall Preparation and Measurement
The foundation of a great installation is thorough preparation. Rushing through this step is the number one cause of crooked signs, misaligned letters, and damaged walls—accounting for roughly 40% of professional callback visits in our experience.
Inspect the Mounting Surface
Start by examining the wall material. Different surfaces require different approaches:
- Concrete or brick walls — You’ll need masonry drill bits and wall plugs. These surfaces offer the strongest hold but require more time to drill.
- Drywall or partition walls — Use appropriate hollow-wall anchors. Avoid heavy signs on thin drywall without reinforcement.
- Metal panels — Self-tapping screws or rivets work well. Ensure the panel is at least 1.5mm thick to support the sign weight.
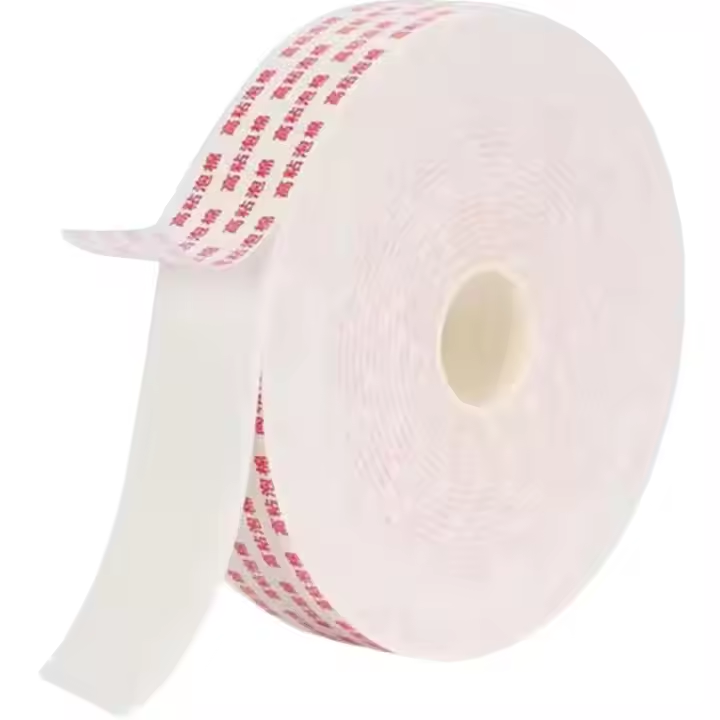
- Glass or tile surfaces — Consider adhesive mounting with double sided foam tape or suction-based magnetic systems to avoid drilling.
Mark Your Layout
Using the sign’s full-size template (or the letters themselves), mark the exact mounting positions on the wall. Use a spirit level to ensure everything is straight. Mark drill points clearly — it helps to use a center punch on hard surfaces to prevent the drill bit from wandering.
For large installations with many individual letters, create a paper template first. Tape the template to the wall, verify alignment, then transfer the drill marks.
Step 2: Choose Your Mounting Method
The mounting method you choose depends on the sign type, wall material, sign weight, and aesthetic requirements. Here are the four primary methods used in the sign industry.
Method 1: Screw Mounting
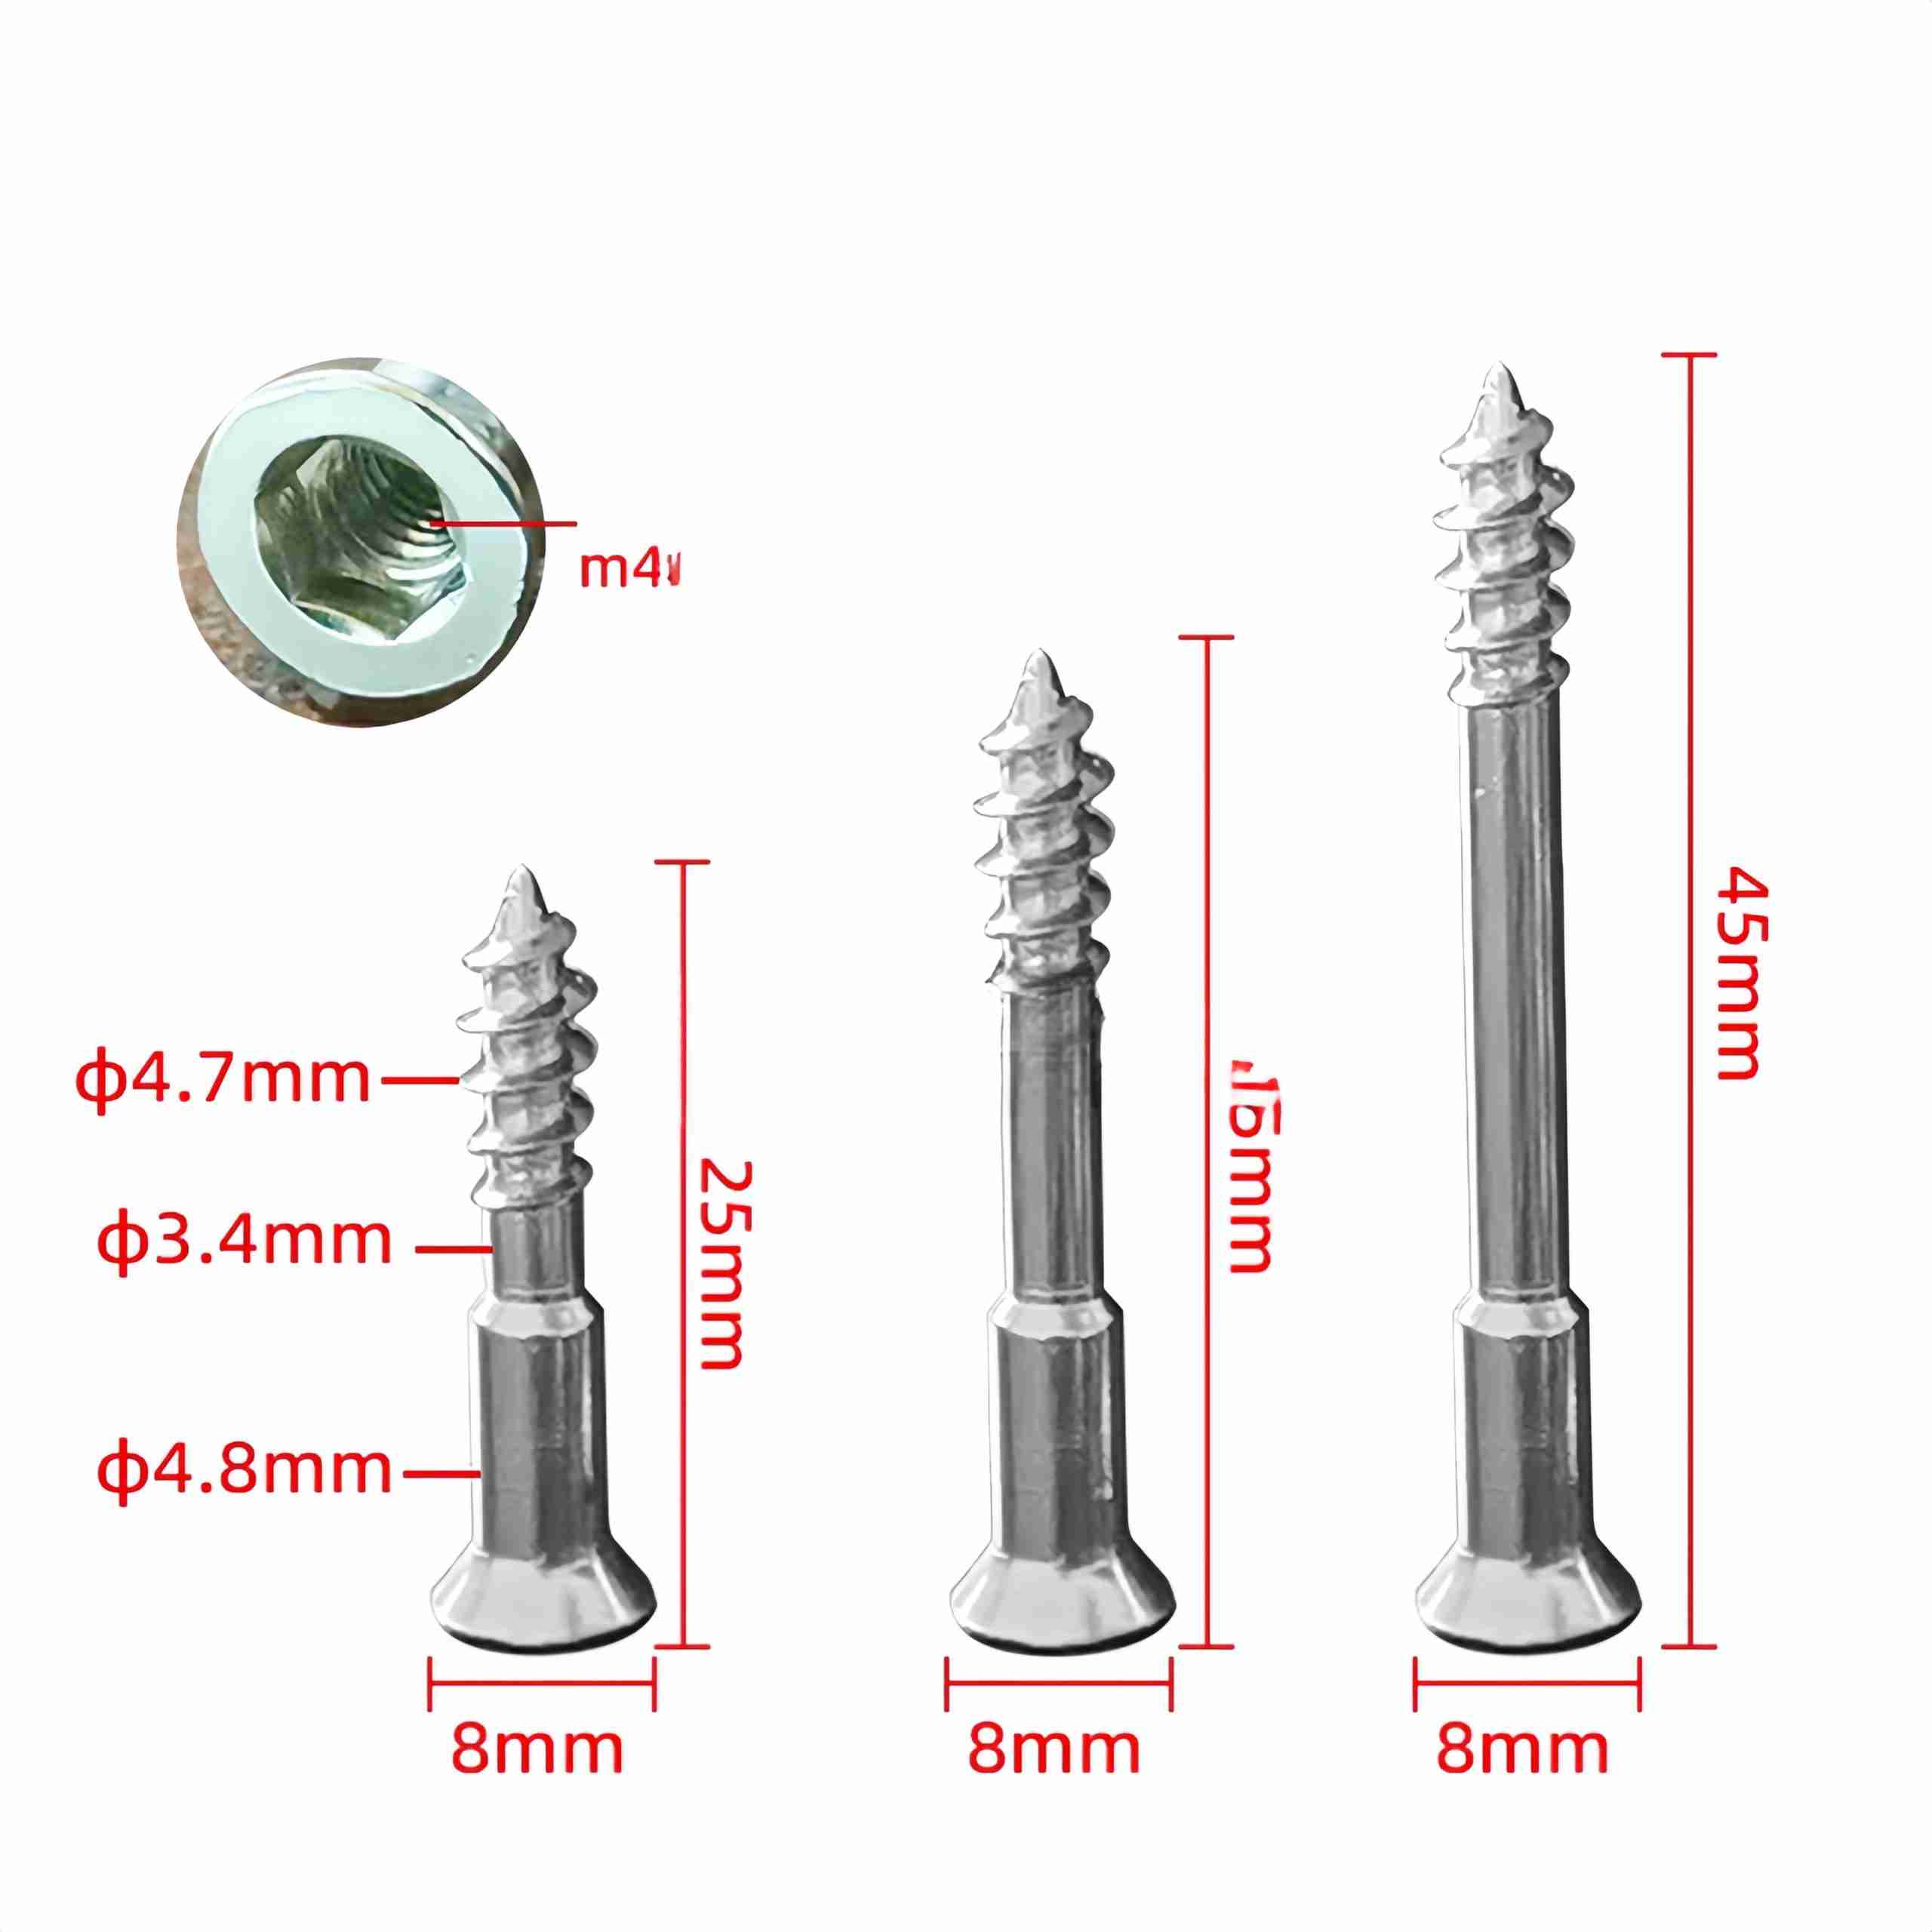
Screw mounting is the most traditional and widely used method. It’s strong, reliable, and works on nearly any solid wall surface. For LED luminous signs, the standard approach uses threaded mounting studs that screw into inserts embedded in the letter or sign body.
Key hardware:
- Special Screw — The go-to screw for most luminous character installations
- Backlight Dual Purpose Screw — Designed specifically for backlit signs, combining mounting and spacing functions
Best for: Front-lit channel letters on concrete, brick, or solid walls
Limitation: Leaves visible screw heads unless using countersunk hardware with caps
Method 2: Support Pole / Standoff Mounting
Support pole mounting creates a clean, floating effect by spacing the sign away from the wall. This method is popular for backlit signs where the halo glow effect needs room to spread. According to Sign Builder Illustrated (2024), standoff mounting accounts for approximately 35% of all backlit sign installations in North America.
Key hardware options:
- Backlit support feet — Affordable and easy to install, these provide consistent spacing between the sign and the wall
- L-shaped support pole — Ideal for heavy signs that need additional lateral support
- New welding bracket — For permanent installations where the bracket can be welded to the sign frame
- Back-illuminated quick-release feet — The best choice when signs need to be removed periodically for maintenance
- Backlit thin support pole — A low-profile option for smaller signs where minimal visible hardware is preferred
Best for: Backlit signs, reverse-lit channel letters, and any installation where a floating effect is desired
Limitation: Requires precise drilling alignment; visible hardware may not suit all design aesthetics
Method 3: Magnetic Track System
Magnetic track systems are the fastest-growing mounting method in the sign industry. Instead of drilling each letter individually, you install a magnetic track on the wall, and each letter attaches magnetically. This dramatically reduces installation time—by up to 40% compared to individual screw mounting—and allows easy repositioning.
How it works:
- The second generation magnetic track strip is mounted to the wall using screws or adhesive
- Each letter has a magnetic backing that snaps onto the track
- Power is conducted through the track using a magnetic conductive head at each connection point
- A magnetic conversion head routes power between track sections
The system supports three installation orientations:
- Suspended mounting — Signs hang from an overhead track using track word hanging rope
- Bottom-supported mounting — The track runs along the bottom edge, supporting the sign weight from below
- Surface mounting — The track mounts directly behind the sign for a flush appearance
Best for: Retail storefront signs, shopping mall installations, and projects with many individual letters requiring frequent servicing
Limitation: Higher upfront hardware cost; limited weight capacity per letter compared to screw mounting
Method 4: Hanging Mounting
Hanging mounting is used when signs need to be suspended from above — common for interior signage, double-sided hanging signs, and ceiling-mounted displays.
Key hardware:
- Hidden Hanging — Provides a clean, hardware-free appearance when viewed from the front
- Gourd Hanging — A decorative hanging option for lighter signs where the hardware itself is part of the design
- Z shape hook — Simple and effective for bottom-plate mounting
- Mountain shape hook — Similar to Z hooks but with a different profile for specific sign designs
Best for: Interior signs, ceiling-suspended signage, lightweight display letters
Limitation: Not suitable for outdoor exposed locations or heavy signs; wind load must be considered
Step 3: Wiring and Power Connection
Proper electrical work separates professional installations from amateur ones. Incorrect wiring is the leading cause of LED module failure and fire hazards in sign installations.
Plan Your Power Layout
Before connecting anything, map out your power distribution. Key considerations:

- Calculate total power draw — add up the wattage of all LED modules and ensure your power supply has at least 20% headroom (e.g., a 100W total LED load needs a minimum 120W power supply)
- Keep wire runs as short as possible — voltage drop over runs longer than 4.5 meters (15 feet) causes noticeable uneven brightness; use 16 AWG wire for runs up to 3 meters and 14 AWG for runs up to 6 meters
- Use the correct wire gauge — thicker wire for longer runs and higher current
- Plan for maintenance access — leave slack in wires and use connectors rather than hard-soldering everything
Make Your Connections
Use quality connectors to join wire segments and connect to LED modules. Avoid twisting wires together and wrapping with tape — this is unreliable and a code violation in most jurisdictions.
According to UL 48 Electric Sign Standards (2023), outdoor LED sign installations require IP65 or higher rated connectors for exposed electrical connections. For waterproof outdoor installations, use IP67-rated connectors and seal all junction points with silicone or heat-shrink tubing.
If you’re new to adhesive bonding for LED strips and modules, our guide on how to glue LED light strips covers the right adhesives for different strip materials.
Test Before Final Installation
Before mounting the sign permanently, connect everything and test:
- Use a power tester to verify voltage at each connection point
- Check all LED modules are lit with consistent brightness
- Run the sign for at least 30 minutes to check for heat issues; surface temperature should not exceed 60°C (140°F)
- For best results, run new signs through an LED aging test bench for 24 hours before installation to catch early failures
Step 4: Final Alignment and Testing
Once the sign is mounted and wired, it’s time for final checks:
- Visual alignment — Step back at least 5 meters and check that all letters are level, evenly spaced, and correctly positioned
- Electrical test — Verify all modules light up, colors are consistent (for RGB signs), and there are no flickering sections
- Secure all fasteners — Go back with a screwdriver and verify every screw and bolt is tight
- Seal penetrations — Apply silicone sealant around all wall penetrations to prevent water ingress
- Document the installation — Take photos of the wiring layout and mounting details for future maintenance reference
Common Mistakes to Avoid
After years of working with sign shops, these are the installation errors we see most often:
- Skipping the wall inspection — Not checking what’s behind the wall before drilling can hit electrical wiring, plumbing, or structural elements
- Using the wrong screw length — Screws that are too short won’t hold; screws that are too long can crack the sign face or damage internal components
- Ignoring voltage drop — Long wire runs beyond 4.5 meters (15 feet) without adequate gauge cause the last letters in a chain to be noticeably dimmer than the first—up to 15% brightness loss per 3 additional meters
- Not using a level — Eyeballing alignment almost always results in crooked signs
- Forgetting waterproofing — Outdoor signs without proper sealing fail within 3 to 6 months in rainy climates
- Over-tightening screws — This can crack acrylic faces, distort letter shapes, or damage LED modules hidden behind the face
Conclusion
A successful LED luminous sign installation comes down to preparation, the right hardware, and attention to detail. Whether you choose traditional screw mounting, modern magnetic track systems, or hanging methods, the fundamentals are the same: measure carefully, use quality components, test thoroughly, and always prioritize safety.
At 8 Shop Signs, we supply professional sign shops worldwide with the mounting hardware, tools, and accessories needed for reliable installations. Browse our screws and fasteners and tools categories to find everything you need for your next project. For questions about specific products or bulk orders, contact our team.
When NOT to Use These Recommendations
While this guide covers the most common LED sign installation scenarios, there are situations where the methods described here may not apply:
- Historic or landmark buildings — Properties with heritage protection often have strict regulations prohibiting wall penetrations of any kind. In these cases, consult local preservation authorities and consider freestanding signage or non-invasive adhesive systems approved for historic substrates.
- Extreme weather zones — Installations in hurricane-prone coastal regions (wind speeds exceeding 150 km/h or 93 mph), arctic environments (sustained temperatures below -30°C/-22°F), or desert climates with daily temperature swings exceeding 40°C (72°F) may require engineering consultation beyond this general guide. Standard mounting hardware may not withstand these conditions.
- Very large or heavy signs — Signs weighing over 45 kg (100 lbs) or spanning more than 3 meters (10 feet) in width typically require structural engineering assessment, building permits, and load calculations that go beyond DIY installation methods. Always involve a licensed structural engineer for oversized installations.
- High-voltage or integrated building systems — If your sign connects directly to a building”s main electrical panel (not a standard wall outlet) or integrates with building-wide automation, fire alarm, or emergency lighting systems, a licensed electrician must perform the electrical work per local code requirements.
Frequently Asked Questions
What voltage do LED luminous signs typically run on?
Most LED luminous signs operate on 12V DC, which is the industry standard for safety and compatibility. 24V DC systems are increasingly popular for larger signs because they reduce voltage drop over longer wire runs. Always use a dedicated, certified LED driver (power supply) rated for your total wattage plus at least 20% headroom. Never connect LED modules directly to mains 110V/220V AC without a proper driver.
Can I install an LED sign on drywall without reinforcement?
It depends on the sign weight. Drywall alone can support signs up to approximately 5 kg (11 lbs) using toggle bolts or molly anchors. For signs between 5 to 15 kg (11 to 33 lbs), you must anchor into the wall studs. For signs over 15 kg (33 lbs), additional reinforcement—such as a plywood backer board or French cleat system—is required to distribute the load and prevent drywall failure. Always verify stud positions with a stud finder before drilling.
How do I waterproof an outdoor LED sign installation?
Waterproofing involves three layers of protection. First, use IP67-rated LED modules and connectors for all outdoor wiring—IP67 means protection against temporary immersion in water. Second, apply neutral-cure silicone sealant around every wall penetration (screw holes, cable entries) to prevent water ingress behind the sign. Third, install a drip loop on all outdoor cables—this means the wire should curve downward before entering the wall, so water drips off rather than following the wire into the building. Check seals annually; silicone degrades under UV exposure over 2 to 3 years.
What is the most common mistake when mounting LED channel letters?
The most common and costly mistake is drilling without confirming what lies behind the wall surface. Hitting electrical conduit, water pipes, or structural rebar can cause serious damage, injury, and expensive repairs. Always scan the wall with a multi-function detector that identifies metal, live AC wiring, and studs. The second most common mistake is using screws that are too long—exceeding the letter body depth by more than 5mm often punctures the acrylic face or damages internal LED modules.
How do I prevent uneven brightness across a multi-letter sign?
Uneven brightness is almost always caused by voltage drop in the wiring. To prevent it: (1) keep wire runs under 4.5 meters (15 feet) where possible; (2) use 16 AWG or thicker wire for runs beyond 3 meters; (3) wire letters in a star/parallel topology rather than daisy-chaining them end-to-end; (4) ensure your power supply is rated for at least 120% of total LED wattage. If some letters remain dimmer, use a power tester to check voltage at each letter—the difference between the first and last letter should be under 0.5V.
Do I need a building permit to install an outdoor LED sign?
Requirements vary by jurisdiction, but most municipalities require a permit for externally mounted illuminated signage—especially for signs larger than 1 square meter (approximately 10.8 square feet). Typical requirements include: a site plan showing sign location, mounting specifications, electrical load calculations, and proof of compliance with local sign ordinances (size, height, illumination limits). Contact your local building department before beginning installation; installing without a required permit can result in fines and forced removal.
Can magnetic track systems hold heavy channel letters securely?
Magnetic track systems are rated for letters up to approximately 3 kg (6.6 lbs) per individual letter for standard track configurations. For heavier letters, additional mechanical fasteners or hybrid mounting (magnetic track plus one mechanical anchor point per letter) is recommended. The system excels for retail environments with many small-to-medium letters and where repositioning is desired, but for large exterior letters over 60 cm (24 inches) tall, traditional screw mounting or support pole systems provide greater long-term reliability under wind and weather exposure.
How often should installed LED signs be inspected and maintained?
Establish a maintenance schedule based on the sign”s environment. For indoor signs, inspect every 12 months for dust accumulation, loose connections, and any dimming or flickering modules. For outdoor signs, inspect every 6 months—check silicone seals, rust on hardware, water ingress, and LED brightness consistency. After major storms or extreme weather events, perform an immediate visual and electrical check. Most LED modules are rated for 50,000 hours (approximately 5.7 years of continuous operation), so plan for partial module replacement around year 4 to 5 to maintain uniform brightness.
Last reviewed: June 20, 2026. Content updated for accuracy — see our blog for the latest guides.